Diapering: What’s All the Stink About?

July 20, 2022 Infant

How can such a beautiful bundle of joy produce such stinky, leaky and explosive diapers?! Changing diapers is a big part of taking care of your baby and although it’s often messy, it can also be a time for bonding!

Whether you choose cloth or disposable diapers, your baby will go through a lot of them! Newborns over 5 days old will usually go through 10-12 diapers per day, a few more if using cloth. You’ll need to change them every 2-3 hours or sooner if they pooped or the diaper is wet. Sitting in a wet or soiled diaper can cause diaper rashes or more serious infections.

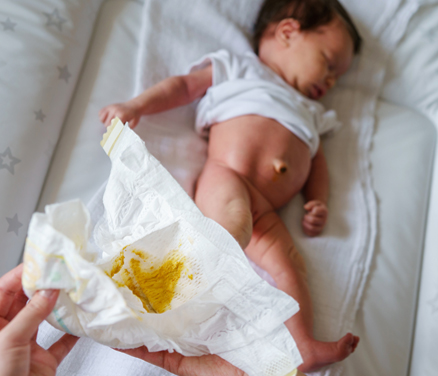
After passing the meconium (their first poop), your breastfed baby’s poop will be a watery, yellow-color with white seedy curds in it. The poop of formula-fed babies is yellow or tan. Babies will poop several times per day, often after every feeding. Occasional leaks and “blow outs” are normal but if this happens a lot, try a different size, brand or style of diaper.
Your baby’s poop will change as they get older and their diet changes. If they have gray, white, or red poop tell your baby’s health care provider. After they are 2-4 days old, their urine should be clear to pale yellow. If they are not having 6-8 wet diapers per day, or their urine is dark colored or foul smelling, call their health care provider. These can be signs they’re not getting enough human milk or formula.
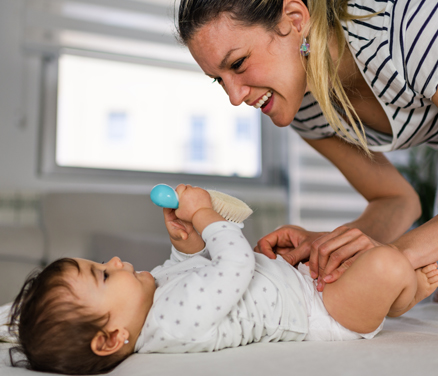
Changing your baby’s diaper in a safe location is essential whether you are at home, shopping or elsewhere. Keep supplies within reach and NEVER leave your baby unattended or walk away when they are on a changing table. It only takes a second to roll off when you least expect it. As they get older, they will squirm and twist during diaper changes so it may be safer to change them on the floor, instead of up high on a changing table. To help things go smoothly, talk to your baby to keep them happy or give them a toy to help keep their hands occupied.

StarTo keep things clean:

StarAlways keep these in your diaper bag:

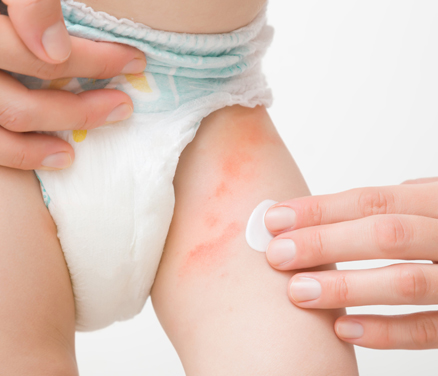
Even when doing your best, diaper rashes can occur. Leaving a soiled or wet diaper on too long, a food allergy, sensitivity to the diapers or wipes, soaps or lotions, or the use of antibiotics or other medications can all lead to diaper rash. They can also develop a yeast infection; these are bright red, raised areas throughout the diaper area and do not clear up with regular diaper cream.
If your baby gets a diaper rash, try wet cloths instead of wipes, use a diaper cream or petroleum jelly and allow their diaper area to air out. Call your baby’s health care provider if the rash does not improve in 3-4 days; you might need a different medication. When it’s hot, using cornstarch powder can help keep the diaper area dry. Avoid talc-based baby powder because it can cause breathing problems if inhaled. Heat rash is also common; frequent bathing, cooling off and changing diapers more often should help this go away.
star

You will quickly become a pro at changing diapers.
Laugh through the messes and enjoy the little moments with your baby!

Side Lying Hold

Side-Lying Hold

  1. For the right breast, lie on your right side with your baby facing you.
  2. Pull your baby close. Your baby’s mouth should be level with your nipple.
  3. In this position, you can cradle your baby’s back with your left arm and support yourself with your right arm and/or pillows.
  4. Keep loose clothing and bedding away from your baby.
  5. Reverse for the left breast.

This hold is useful when:

Cross Cradle Hold

Cross-Cradle Hold

  1. For the right breast, use your left arm to hold your baby’s head at your right breast and baby’s body toward your left side. A pillow across your lap can help support your left arm.
  2. Gently place your left hand behind your baby’s ears and neck, with your thumb and index finger behind each ear and your palm between baby’s shoulder blades. Turn your baby’s body toward yours so your tummies are touching.
  3. Hold your breast as if you are squeezing a sandwich. To protect your back, avoid leaning down to your baby. Instead, bring your baby to you.
  4. As your baby’s mouth opens, push gently with your left palm on baby’s head to help them latch on. Make sure you keep your fingers out of the way.
  5. Reverse for the left breast.

This hold is useful when:

Football Hold

Clutch or “Football” Hold

  1. For the right breast, hold your baby level, facing up, at your right side.
  2. Put your baby’s head near your right nipple and support their back and legs under your right arm.
  3. Hold the base of your baby’s head with your right palm. A pillow underneath your right arm can help support your baby’s weight.
  4. To protect your back, avoid leaning down to your baby. Bring baby to you instead.
  5. Reverse for the left breast.

This hold is useful when:

Breastfeeding Holds

Cradle Hold

  1. For the right breast, cradle your baby with your right arm. Your baby will be on their left side across your lap, facing you at nipple level.
  2. Your baby’s head will rest on your right forearm with your baby’s back along your inner arm and palm.
  3. Turn your baby’s tummy toward your tummy. Your left hand is free to support your breast, if needed. Pillows can help support your arm and elbow.
  4. To protect your back, avoid leaning down to your baby. Instead, bring your baby to you.
  5. Reverse for the left breast.

This hold is useful when:

Breastfeeding Holds

Laid-Back Hold

  1. Lean back on a pillow with your baby’s tummy touching yours and their head at breast level. Some moms find that sitting up nearly straight works well. Others prefer to lean back and lie almost flat.
  2. You can place your baby’s cheek near your breast, or you may want to use one hand to hold your breast near your baby. It’s up to you and what you think feels best.
  3. Your baby will naturally find your nipple, latch, and begin to suckle.

This hold is useful when: