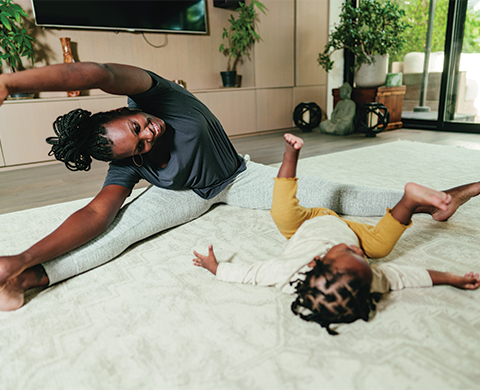
After the birth of my first daughter, I felt like a stranger in my body. My pelvic floor seemed to have disappeared. Surely my insides were going to fall right out! Not true, of course, but the connection between mind and body is powerful—especially in new motherhood.
Yoga Support for
Body & Heart
As a new mom, my body and my heart wanted the same thing: support! Postnatal yoga helped with both. My body grew stronger as I practiced yoga in the months following my daughter’s birth. Emotionally, postnatal yoga helped me feel balanced. Mindfully moving my body and breathing deeply put me in a better mood. Yoga helped me, and it can help you too!
3 Poses for You, Mama
Your health-care provider will generally give you the OK to begin practicing yoga about 6 weeks after giving birth vaginally, or 8 weeks if you birthed by Cesarean (C-section). Yoga poses like Bridge, Chair, and Seated Eagle can help support your body and bring more happiness into your day. Give them a try, and remember: you can make your practice feel complete by sitting still for 10 breaths before you begin, and lying down for at least 3 to 5 minutes when you’ve finished.
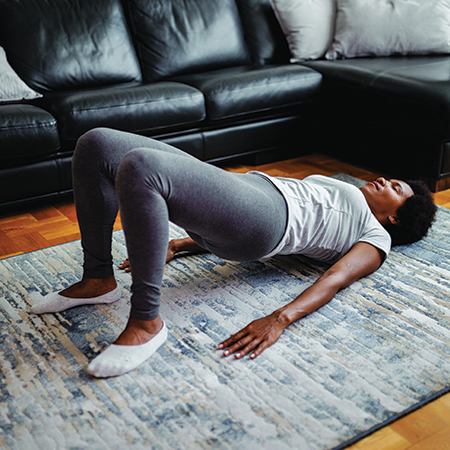
1) Open Your Heart
BRIDGE POSE opens your chest after all that time spent rounding forward to feed and cuddle baby.
HOW TO: On your back, position heels beneath knees and rest your arms by your side. Relax your neck. Inhale into your chest. Exhale and lift thighs and hips toward the ceiling. Point your tailbone toward your knees. Relax your buttocks. Gently lift pelvic floor. For more support, press elbows into the ground and place your hands at your low back. Take 8 breaths. To finish, remove your hands from your low back, slowly rolling down the length of your spine. Breathe as you go.
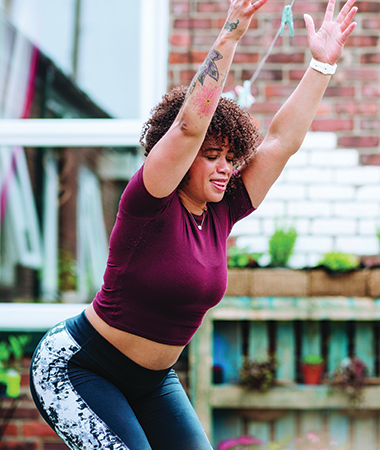
2) Strengthen Your Body
CHAIR POSE restores your pelvic floor while strengthening your legs.
HOW TO: Stand with your feet hip distance apart, toes forward. Keep knees over heels as you lower your hips. (If your heels rise, place a rolled towel underneath.) Aim your tailbone slightly toward the ground. Gently lift your collarbone. Lift your arms overhead, alongside your ears. Relax your shoulders. Lightly lift low belly and pelvic floor away from thighs. Start with a few breaths, and work up to 10 as you get stronger. To finish, exhale as you straighten your legs and slowly lower your arms.
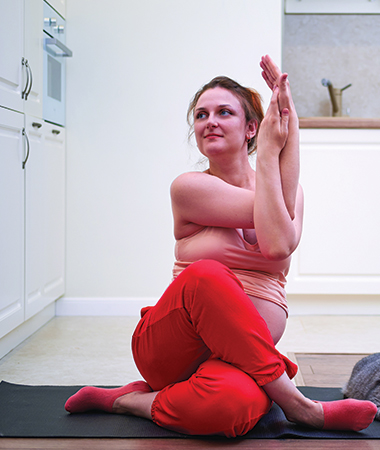
3) Ease Your Aching Back
SEATED EAGLE POSE unwinds your upper back as you round forward to soothe yourself.
HOW TO: Sit tall. Cross right knee deeply over your left. Draw heels toward hips. (For sensitive knees, loosely cross your legs, or open them into a gentle straddle.) Inhale, cross left elbow over right. Bending at the elbows, snuggle the backs of your hands together. Exhale and fold forward. Enjoy 5 slow breaths. To finish, inhale to sit up; exhale to unwind. Repeat on the other side.
The ‘I’m a WIC Client’ button now directs to Nutrition and Breastfeeding, the content offered on the site has not changed.
Side-Lying Hold
For the right breast, lie on your right side with your baby facing you.
Pull your baby close. Your baby’s mouth should be level with your nipple.
In this position, you can cradle your baby’s back with your left arm and support yourself with your right arm and/or pillows.
Keep loose clothing and bedding away from your baby.
Reverse for the left breast.
This hold is useful when:
You had a C-section
You want to rest while baby feeds
You are breastfeeding in the middle of the night
You and your baby are comfortable in this position
Cross-Cradle Hold
For the right breast, use your left arm to hold your baby’s head at your right breast and baby’s body toward your left side. A pillow across your lap can help support your left arm.
Gently place your left hand behind your baby’s ears and neck, with your thumb and index finger behind each ear and your palm between baby’s shoulder blades. Turn your baby’s body toward yours so your tummies are touching.
Hold your breast as if you are squeezing a sandwich. To protect your back, avoid leaning down to your baby. Instead, bring your baby to you.
As your baby’s mouth opens, push gently with your left palm on baby’s head to help them latch on. Make sure you keep your fingers out of the way.
Reverse for the left breast.
This hold is useful when:
Your baby is premature
Your baby has a weak suck
Your baby needs help to stay latched
Your baby needs extra head support
You and your baby are comfortable in this position
Clutch or “Football” Hold
For the right breast, hold your baby level, facing up, at your right side.
Put your baby’s head near your right nipple and support their back and legs under your right arm.
Hold the base of your baby’s head with your right palm. A pillow underneath your right arm can help support your baby’s weight.
To protect your back, avoid leaning down to your baby. Bring baby to you instead.
Reverse for the left breast.
This hold is useful when:
You had a C-section
You have large breasts
You have flat or inverted nipples
You have a strong milk let-down
You are breastfeeding twins
Your baby likes to feed in an upright position
Your baby has reflux
You and your baby are comfortable in this position
Cradle Hold
For the right breast, cradle your baby with your right arm. Your baby will be on their left side across your lap, facing you at nipple level.
Your baby’s head will rest on your right forearm with your baby’s back along your inner arm and palm.
Turn your baby’s tummy toward your tummy. Your left hand is free to support your breast, if needed. Pillows can help support your arm and elbow.
To protect your back, avoid leaning down to your baby. Instead, bring your baby to you.
Reverse for the left breast.
This hold is useful when:
Your baby needs help latching on
You and your baby are comfortable in this position
Laid-Back Hold
Lean back on a pillow with your baby’s tummy touching yours and their head at breast level. Some moms find that sitting up nearly straight works well. Others prefer to lean back and lie almost flat.
You can place your baby’s cheek near your breast, or you may want to use one hand to hold your breast near your baby. It’s up to you and what you think feels best.
Your baby will naturally find your nipple, latch, and begin to suckle.
This hold is useful when:
Your baby is placed on your chest right after birth
You have a strong milk let-down
You have large breasts
You and your baby are comfortable in this position